Chords for Advanced Fingerpicking Techniques Lesson 11 - Picking Pattern #2
Tempo:
67.8 bpm
Chords used:
G
Em
B
D
C
Tuning:Standard Tuning (EADGBE)Capo:+0fret
Jam Along & Learn...
[C] [G] Hi [Em]
[G] everyone, [N] this is Zane Sharon and welcome to finally another advanced fingerpicking
number 11 this time.
Today we're going to look at a very cool pattern that I kind of developed in the last year or so.
variety of chords and I'll show you how the pattern goes and
So let's take a look at what's going on in close up.
Bm11 chord and it's played like this.
A string, ring finger 2nd fret G string, pinky 3rd fret B string.
100% ➙ 68BPM
G
Em
B
D
C
G
Em
B
_ _ [C] [G] Hi _ _ [Em] _ _
_ _ _ [G] _ _ _ everyone, _ [N] _ this is Zane Sharon and welcome to finally another advanced fingerpicking
lesson, number 11 this time.
It's been quite a while, I know, my apologies.
Too young kids keep you very busy.
Today we're going to look at a very cool pattern that I kind of developed in the last year or so.
This one's really good with a variety of chords and I'll show you how the pattern goes and
where I kind of use it.
But it's a very flexible pattern, you can use it in a lot of songs.
So let's take a look at what's going on in close up.
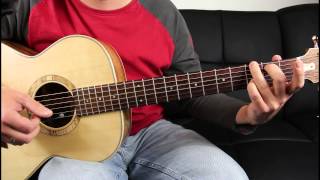
So we're going to start this pattern with a Bm11 chord and it's played like this.
I'll show you the way I play it.
Middle finger here, 2nd fret A string, ring finger 2nd fret G string, pinky 3rd fret B string.
Okay, so the D string and the E string are open, it sounds like this.
_ [B] _ _
_ _ Now if you go back to [C] some of my other lessons you'll see that we're going to use this rule,
thumb plays the bottom 3 notes, bass notes, and one finger per [E] string up here. _
_ [N] We're going to go ahead and place our right hand on the chord.
So thumb is playing the A string on this chord and then one finger per string with the others.
That's 1st finger playing G, middle finger playing B, ring finger playing high E.
So we're going to start with the middle finger playing the B string as well as [Bm] the bass right
here and it's going to sound like this together.
Then we're going to use our 1st finger to [A] play the G string, [D] so it sounds like this. _ _ _
[N] Now we're going to do a chuck, a click with the thumb.
Now you can do this by bringing the thumb down onto the low E or the A string and you
have to have relatively low action, don't try to do this on an old Martin, the setup
for bluegrass guys because it'll be really tricky.
It also doesn't sound as good on nylon string guitars as steel string.
So anyway we have this click here, okay, and that comes after [D] this. _ _
_ _ _ The next step is using the ring finger to play the high E string.
_ [Am] _ [E] Now you might notice what I'm going to do [B] here is leave my thumb, after that click I'm
going to leave it on the A string because it's ready to play the next note like _ [Em] _
that.
[D] Let me try that again.
The [Em] _ _ next note then [Bm] is the B string with the middle finger, _ _ [B] _ _
another click, [D] and finally
[A] the 1st finger plays the G string.
[F#m] I'll do it very slowly for you.
_ [F#] _ _ [F#m] _ _ [A] _
_ [E] Now I finger this chord like this, but [F#m] there's a variety of ways you could do it.
I do it like this.
[B] _ _ _ _ _ _ _
_ _ [D] [G] Now this chord progression we're going to use in the song [B] after this goes like this.
The B minor [C] 11th followed by a C add 9, common chord, okay, [B] here, here, open G, and leave
this pinky [C] here.
Then we're going to go to G6 which is [G] just moving these two down to the 3rd fret low
E string and 2nd fret here.
[Bm] _ And then we're going to [Em] follow it up by standard E minor chord.
[B] So once again, _ _ [C] _ _ _
[Em] _ _ _ _ okay, and you can go through [D] these very slowly.
[B] _ _ [D] _ [G] _ [C] _ _ [G] _ _
_ [Em] _ _ _ _ _ Now the thumb always [G#] follows the bass note.
For example, the first two chords, the [D] root is on the A string and the last two chords,
the G and the E minor, the root is on the 6th string.
So that's where you have to play the note.
[G] _ _ _ [Em] _ _ _
Okay, here it is quick.
[B] _ [G] _ _ _ _ _
[Em] _ _ [F#m] _ _ [G] _ _ _ _
_ [Em] _ _ _ So I hope [N] that was somewhat understandable to you.
I'm going to show you a tune now where I use this pattern, or I like to use it, and it
was a big hit from last year, Tom O'Dell's Another Love.
And it has these exact same [B] chords I just showed you.
B minor 11, [G] C add 9, G6, [Em] and E minor.
_ [N] So I'll sing a little bit in there and I'll probably do a little improvisation so you
can kind of see where you can go with this pattern.
So here we go.
[G] All my tears have been used up on another love.
[Em]
All [B] my tears have [G] been used up on another [Em] love.
Another love.
All my tears [G] have been used up. _
[Em] Oh.
_ [Bm] _ [G] _ _ _ _ _
[Em] _ _ [N] So there you go.
Advanced Fingerpicking Pattern number 2.
I hope this was helpful for you and you get a hold of it.
If you like what you saw here, please subscribe to my YouTube channel as there are always
more performance and tutorials on the way. _ _ _ _
_ _ _ _ _ _ _ _
_ _ _ [G] _ _ _ everyone, _ [N] _ this is Zane Sharon and welcome to finally another advanced fingerpicking
lesson, number 11 this time.
It's been quite a while, I know, my apologies.
Too young kids keep you very busy.
Today we're going to look at a very cool pattern that I kind of developed in the last year or so.
This one's really good with a variety of chords and I'll show you how the pattern goes and
where I kind of use it.
But it's a very flexible pattern, you can use it in a lot of songs.
So let's take a look at what's going on in close up.
So we're going to start this pattern with a Bm11 chord and it's played like this.
I'll show you the way I play it.
Middle finger here, 2nd fret A string, ring finger 2nd fret G string, pinky 3rd fret B string.
Okay, so the D string and the E string are open, it sounds like this.
_ [B] _ _
_ _ Now if you go back to [C] some of my other lessons you'll see that we're going to use this rule,
thumb plays the bottom 3 notes, bass notes, and one finger per [E] string up here. _
_ [N] We're going to go ahead and place our right hand on the chord.
So thumb is playing the A string on this chord and then one finger per string with the others.
That's 1st finger playing G, middle finger playing B, ring finger playing high E.
So we're going to start with the middle finger playing the B string as well as [Bm] the bass right
here and it's going to sound like this together.
Then we're going to use our 1st finger to [A] play the G string, [D] so it sounds like this. _ _ _
[N] Now we're going to do a chuck, a click with the thumb.
Now you can do this by bringing the thumb down onto the low E or the A string and you
have to have relatively low action, don't try to do this on an old Martin, the setup
for bluegrass guys because it'll be really tricky.
It also doesn't sound as good on nylon string guitars as steel string.
So anyway we have this click here, okay, and that comes after [D] this. _ _
_ _ _ The next step is using the ring finger to play the high E string.
_ [Am] _ [E] Now you might notice what I'm going to do [B] here is leave my thumb, after that click I'm
going to leave it on the A string because it's ready to play the next note like _ [Em] _
that.
[D] Let me try that again.
The [Em] _ _ next note then [Bm] is the B string with the middle finger, _ _ [B] _ _
another click, [D] and finally
[A] the 1st finger plays the G string.
[F#m] I'll do it very slowly for you.
_ [F#] _ _ [F#m] _ _ [A] _
_ [E] Now I finger this chord like this, but [F#m] there's a variety of ways you could do it.
I do it like this.
[B] _ _ _ _ _ _ _
_ _ [D] [G] Now this chord progression we're going to use in the song [B] after this goes like this.
The B minor [C] 11th followed by a C add 9, common chord, okay, [B] here, here, open G, and leave
this pinky [C] here.
Then we're going to go to G6 which is [G] just moving these two down to the 3rd fret low
E string and 2nd fret here.
[Bm] _ And then we're going to [Em] follow it up by standard E minor chord.
[B] So once again, _ _ [C] _ _ _
[Em] _ _ _ _ okay, and you can go through [D] these very slowly.
[B] _ _ [D] _ [G] _ [C] _ _ [G] _ _
_ [Em] _ _ _ _ _ Now the thumb always [G#] follows the bass note.
For example, the first two chords, the [D] root is on the A string and the last two chords,
the G and the E minor, the root is on the 6th string.
So that's where you have to play the note.
[G] _ _ _ [Em] _ _ _
Okay, here it is quick.
[B] _ [G] _ _ _ _ _
[Em] _ _ [F#m] _ _ [G] _ _ _ _
_ [Em] _ _ _ So I hope [N] that was somewhat understandable to you.
I'm going to show you a tune now where I use this pattern, or I like to use it, and it
was a big hit from last year, Tom O'Dell's Another Love.
And it has these exact same [B] chords I just showed you.
B minor 11, [G] C add 9, G6, [Em] and E minor.
_ [N] So I'll sing a little bit in there and I'll probably do a little improvisation so you
can kind of see where you can go with this pattern.
So here we go.
[G] All my tears have been used up on another love.
[Em]
All [B] my tears have [G] been used up on another [Em] love.
Another love.
All my tears [G] have been used up. _
[Em] Oh.
_ [Bm] _ [G] _ _ _ _ _
[Em] _ _ [N] So there you go.
Advanced Fingerpicking Pattern number 2.
I hope this was helpful for you and you get a hold of it.
If you like what you saw here, please subscribe to my YouTube channel as there are always
more performance and tutorials on the way. _ _ _ _
_ _ _ _ _ _ _ _