Chords for Flamenco Guitar Basic Lessons | Arpeggio (part 1) | Frank Steffen Mueller
Tempo:
120.2 bpm
Chords used:
E
Em
Am
B
F#
Tuning:Standard Tuning (EADGBE)Capo:+0fret

Jam Along & Learn...
[F#] [C#] [Bm] [F#]
[E]
[C] [E]
Hello everybody, my name is Frank-Stefan Müller and [Em] welcome to my flamenco basic lessons
at Ortega Guitars.
the very beginning with the fundamental basics of the fingerpicking
level you are, please start this journey from the very beginning.
You will have a great time and improve a lot.
100% ➙ 120BPM
E
Em
Am
B
F#
E
Em
Am
[F#] _ _ _ _ [C#] _ _ [Bm] _ [F#] _
_ _ _ _ _ _ _ _
_ _ _ _ [E] _ _ _ _
[C] _ _ _ _ [E] _ _ _ _
_ _ Hello everybody, my name is Frank-Stefan Müller and [Em] welcome to my flamenco basic lessons
at Ortega Guitars.
This course starts at the very beginning with the fundamental basics of the fingerpicking
style of Paco de Lucia.
No matter what level you are, please start this journey from the very beginning.
You will have a great time and improve a lot.
Of course you can use this fingerpicking technique for all styles or genres of music.
So let the lessons inspire you.
Create your own arpeggios, write your own songs, grab your guitar and have fun.
So let's get started. _ _
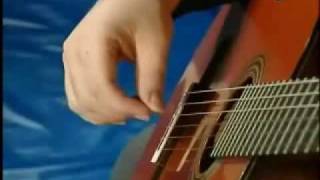
The first arpeggio exercise is played with your thumb, _ [N] index, middle and ring finger.
Here is the labeling of your picking hand fingers.
_ _ _ _ _ _ _ _
[E] _ [Em] _ _ _ _ _ _ _
_ _ _ _ _ _ _ _
_ _ _ _ _ _ _ _
_ _ _ _ _ _ _ _
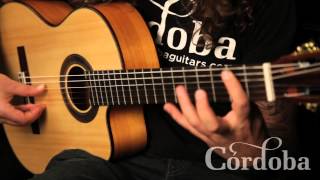
[E] _ _ _ _ _ As you can see, we always use [N] planting.
Planting means placing the right hand fingers on the string before they play.
This technique improves your accuracy, hand stability and speed a lot.
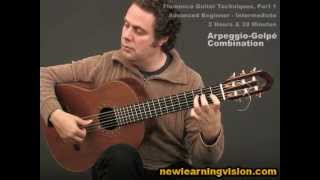
_ Now let's practice the movement of the thumb.
Place your thumb on the low E string and your fingers on the G, B and high E string.
The movement [E] of the thumb is plant, _ pressure in the direction of the soundboard, then play
with rest stroke, _ _ release the tension.
Again plant, _ pressure, _ play, release the tension.
_ Plant, pressure, play, _ release. _ _
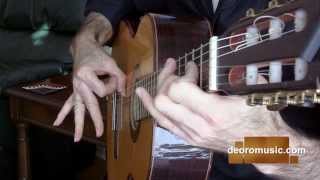
And now let's practice with the fingers I, M and A.
Place your thumb on the low E string and plant your fingers I, M and A on the G, B and E string.
P playing and planting your fingers are in the same motion.
[N] _ _
_ _ _ _ _ _ _ _
_ _ _ _ Play I, M and A always with free stroke.
_ _ [F#m] _
_ _ _ _ _ _ Move your fingers always towards the palm. _ _ _
_ [D] _ _ _ _ [E] _ _ _
_ _ _ _ _ And now the complete exercise.
[N] _ _ Place your thumb on the low E string and plant your fingers I, M and A on the G, B and high E string.
P plays the low E string with [E] rest stroke.
_ I plays with free [Em] stroke towards the palm.
_ M plays towards the palm.
[B] And A plays [E] towards the palm. _
Then P plays the A string while planting I, [B] M, A.
_ _ Then play [G] I, M, A.
_ _ [Em] _ _ [E] P plays the D string while planting I, M, A.
_ Then P is planted on the A [Em] string.
Then play I, M, A.
P plays the A string while planting I, [B] M, A. _
Then P is planted on the low E string.
Then play [G] I, M, A.
[Em] _ And start from the beginning.
_ [E] _ _ [Em] _ _ _ _ _
_ _ _ _ _ _ _ _
_ _ _ _ _ _ _ _
[B] _ _ [Em] Planting. _ _ _ _
[E] _ _ _ _ _ _ _ _
_ _ _ [N] _ _ Always practice this basic arpeggio technique in slow motion.
You can improve your accuracy, hand stability and speed a lot.
Now let's try another chord progression.
It's basically A minor and E7. _ _
_ _ [Am] _ _ _ _ _ _
_ _ _ _ _ _ _ _
[E] _ _ _ _ _ _ _ _
[Am] _ _ _ _ _ _ _ _
[E] _ _ [Fm] _ _ [E] _ _ _ _
[Am] _ _ _ _ _ _ _ _
[E] _ _ _ _ _ _ _ _
[Am] _ _ _ _ _ Thanks _
[Bm] _ _ [F] _ _ [E] _ _ _ _
[Am] _ _ _ _ _ _ _ _
_ _ _ _ for coming along with me on a great journey of guitar lessons.
This is Frank-Stefan Mühle for Ortega Guitars.
Take care and see you [F#] soon. _ _ _ _ _ _ _
_ _ _ _ _ _ _ _
_ _ _ _ _ _ _ _
_ _ _ _ [E] _ _ _ _
[C] _ _ _ _ [E] _ _ _ _
_ _ Hello everybody, my name is Frank-Stefan Müller and [Em] welcome to my flamenco basic lessons
at Ortega Guitars.
This course starts at the very beginning with the fundamental basics of the fingerpicking
style of Paco de Lucia.
No matter what level you are, please start this journey from the very beginning.
You will have a great time and improve a lot.
Of course you can use this fingerpicking technique for all styles or genres of music.
So let the lessons inspire you.
Create your own arpeggios, write your own songs, grab your guitar and have fun.
So let's get started. _ _
The first arpeggio exercise is played with your thumb, _ [N] index, middle and ring finger.
Here is the labeling of your picking hand fingers.
_ _ _ _ _ _ _ _
[E] _ [Em] _ _ _ _ _ _ _
_ _ _ _ _ _ _ _
_ _ _ _ _ _ _ _
_ _ _ _ _ _ _ _
[E] _ _ _ _ _ As you can see, we always use [N] planting.
Planting means placing the right hand fingers on the string before they play.
This technique improves your accuracy, hand stability and speed a lot.
_ Now let's practice the movement of the thumb.
Place your thumb on the low E string and your fingers on the G, B and high E string.
The movement [E] of the thumb is plant, _ pressure in the direction of the soundboard, then play
with rest stroke, _ _ release the tension.
Again plant, _ pressure, _ play, release the tension.
_ Plant, pressure, play, _ release. _ _
And now let's practice with the fingers I, M and A.
Place your thumb on the low E string and plant your fingers I, M and A on the G, B and E string.
P playing and planting your fingers are in the same motion.
[N] _ _
_ _ _ _ _ _ _ _
_ _ _ _ Play I, M and A always with free stroke.
_ _ [F#m] _
_ _ _ _ _ _ Move your fingers always towards the palm. _ _ _
_ [D] _ _ _ _ [E] _ _ _
_ _ _ _ _ And now the complete exercise.
[N] _ _ Place your thumb on the low E string and plant your fingers I, M and A on the G, B and high E string.
P plays the low E string with [E] rest stroke.
_ I plays with free [Em] stroke towards the palm.
_ M plays towards the palm.
[B] And A plays [E] towards the palm. _
Then P plays the A string while planting I, [B] M, A.
_ _ Then play [G] I, M, A.
_ _ [Em] _ _ [E] P plays the D string while planting I, M, A.
_ Then P is planted on the A [Em] string.
Then play I, M, A.
P plays the A string while planting I, [B] M, A. _
Then P is planted on the low E string.
Then play [G] I, M, A.
[Em] _ And start from the beginning.
_ [E] _ _ [Em] _ _ _ _ _
_ _ _ _ _ _ _ _
_ _ _ _ _ _ _ _
[B] _ _ [Em] Planting. _ _ _ _
[E] _ _ _ _ _ _ _ _
_ _ _ [N] _ _ Always practice this basic arpeggio technique in slow motion.
You can improve your accuracy, hand stability and speed a lot.
Now let's try another chord progression.
It's basically A minor and E7. _ _
_ _ [Am] _ _ _ _ _ _
_ _ _ _ _ _ _ _
[E] _ _ _ _ _ _ _ _
[Am] _ _ _ _ _ _ _ _
[E] _ _ [Fm] _ _ [E] _ _ _ _
[Am] _ _ _ _ _ _ _ _
[E] _ _ _ _ _ _ _ _
[Am] _ _ _ _ _ Thanks _
[Bm] _ _ [F] _ _ [E] _ _ _ _
[Am] _ _ _ _ _ _ _ _
_ _ _ _ for coming along with me on a great journey of guitar lessons.
This is Frank-Stefan Mühle for Ortega Guitars.
Take care and see you [F#] soon. _ _ _ _ _ _ _
_ _ _ _ _ _ _ _